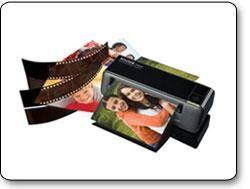
 Unhappy with the results you are getting from your scanner?! Is it due to a lack of scanning knowledge?! Perhaps the points listed below will help you out…
Auto Mode Can Be Best. Most scanners feature an automatic or nearly automatic mode, the scanner equivalent of using a point and shoot camera. If you’re rushing or are clueless about scanning, the auto mode will usually provide reasonably good quality and may be all you need.
Fine-tune with Advanced Modes. If you want the best possible quality from your scanner, explore the advanced modes in your scanner. The best way to do so is to scan the same image with different settings and compare results. For many settings, you won’t even need to scan repeatedly. Simply do a scan preview, change the settings, and you’ll see the effect on the preview image.
Use Restore for Scanning Faded Photos. Most scanners offer a color restore option for restoring color to faded photos. Usually, there’s more than one setting, so you can pick the one that matches the level of fading. If your scanner doesn’t offer color restore, you’ll have to fix the color in a photo editing program instead, which is usually much harder to do.
Clean Up Dust and Scratches. Many scanners offer digital dust and scratch removal features. If your scanner doesn’t offer a good quality dust removal feature, blowing the dust off your photos prior to scanning with canned air takes a lot less time than manually removing dust specks in a photo editing program later.
Fix the Lighting with Backlight Correction. Some scanners offer backlight correction. This can automatically improve photos that were captured with a bright light behind the subject, like someone standing in front of a window. If your scanner has the feature, it’s well worth using for badly lit photos.
Scan Multiple Photos with Batch mode. Look for a batch mode, which allows you to place multiple photos on the flatbed at once and have the scanner automatically put each one in its own file. Usually, you can run a preview scan and adjust scan settings individually for each photo before giving the scan command.
Picking a Resolution Is Important. The basic formula for resolution is easy. For printers whose resolution is a multiple of 300 dots per inch (dpi) nothing over 300 pixels per inch (ppi) for the photo will make any difference when you print, and even 200 ppi looks almost as good. So for anything you may print at the same size, set the scan resolution for at least 200 ppi and no higher than 300 ppi. For printers whose resolution is a multiple of 360 dpi, the equivalent scan resolutions are 360 ppi and 240 ppi.
If you think you might crop the image or print it at larger size, scan it at a resolution that will give you at least 200 (or 240) ppi after it’s enlarged. For a 4 by 6 that you might print at 8 by 10, for example, 8 divided by 4 is 2. So if you want 200 ppi when you print at 8 inches, you need to scan at 400 ppi.
If you never expect to enlarge the image or even print it, 72 ppi is fine for viewing on screen.
Happy scanning!
